The idea
The Paperartzi, as with any of my artworks all starts with an idea.
Here you see the original steps for the Paperartzi logo.
As soon as I get an idea I like, no matter where I am, I scribble it on a “piece of anything” lying about. In this case I had a ball-point pen and a writing pad handy.
You see the first idea sketch on the bottom left.
Back at my studio desk I redrew the idea over and over, working it and revising it till I was totally content with the shapes and overall design. (Some artwork ideas are reworked much more than others, and some ideas are even shelved as too complicated for now).
This little Rip-torn character was going to be my ambassador so he had to look like he was jumping for joy and clicking his heels! I wanting him to be contagiously happy.
Once the shapes are right I focus on colour variations using my favourite medium, colour pencils.
I’m a completely hands on, traditional artist.
Computers do not feature in my work.
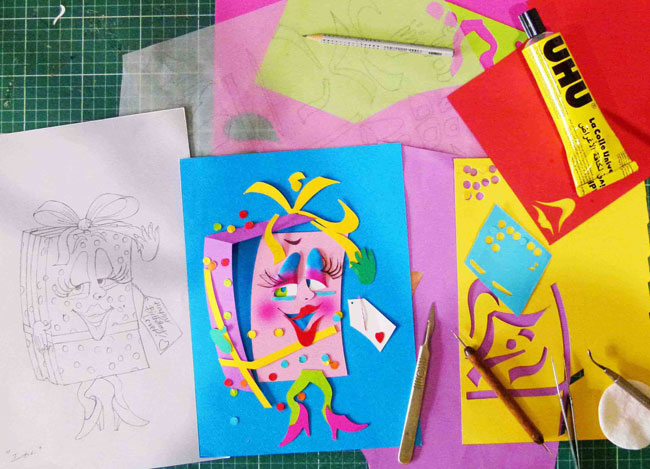
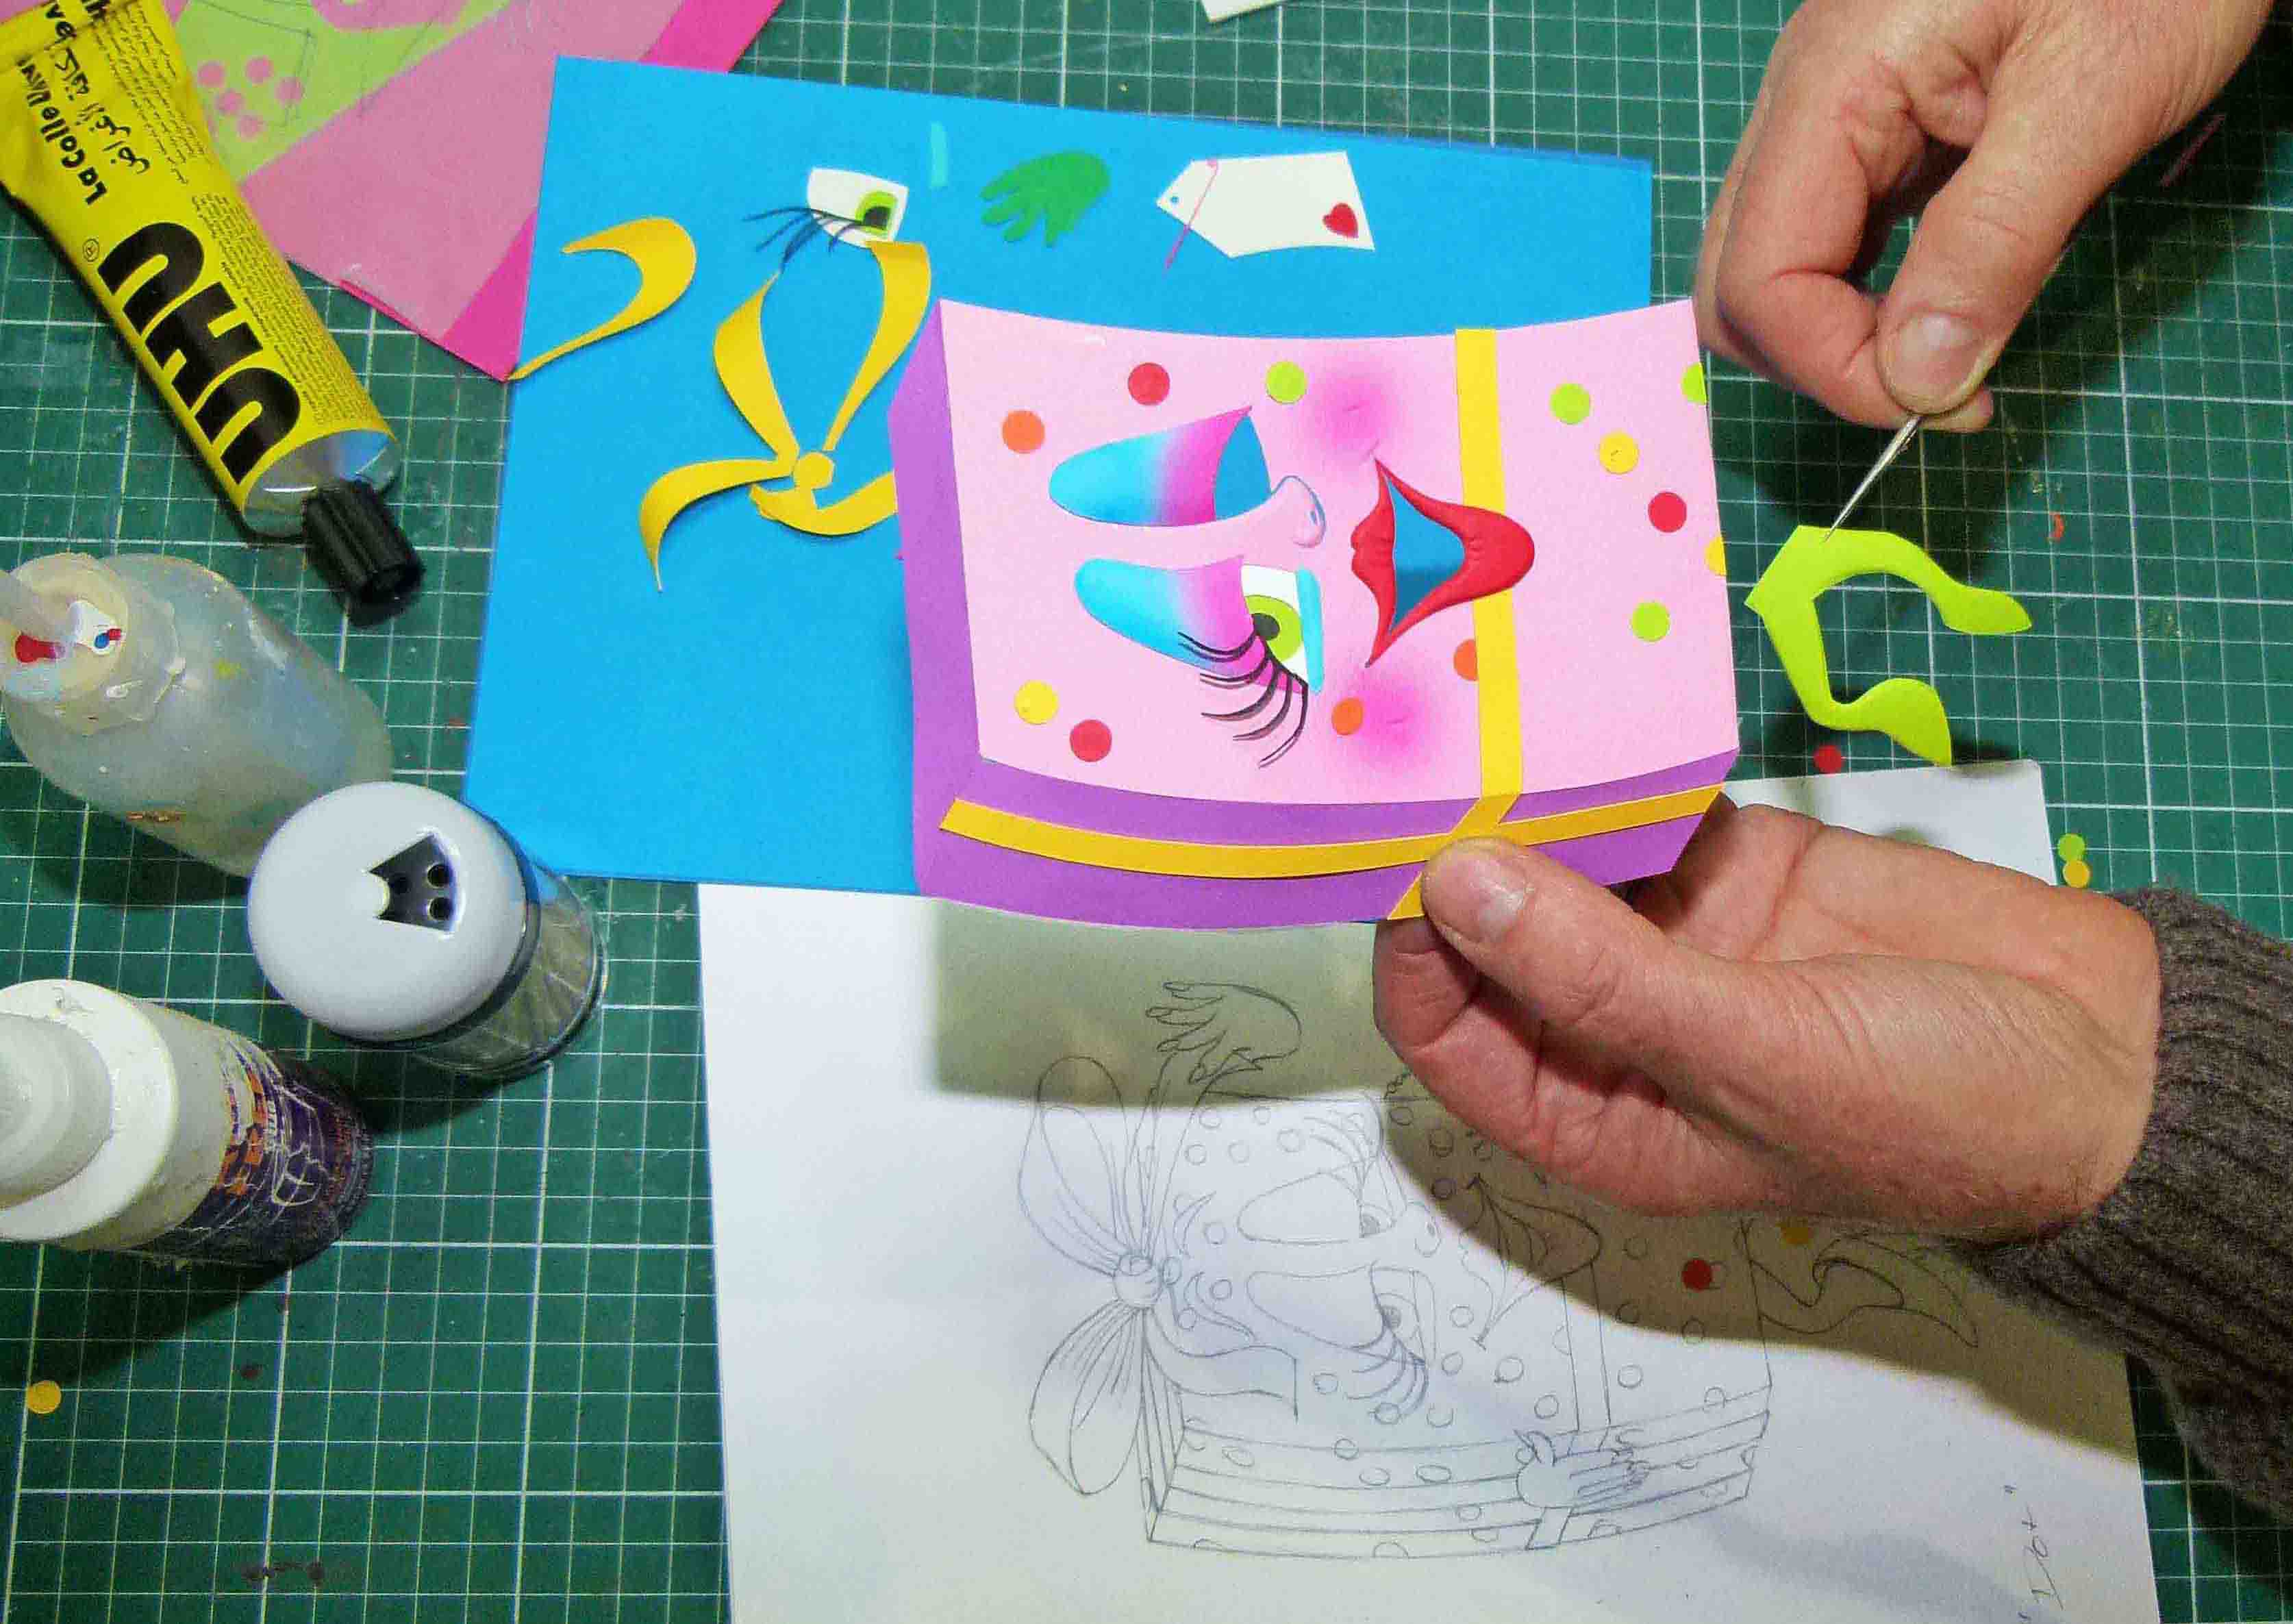
Sculpting parts
A sculpture is firstly analysed into component parts from the final drawing. Each part is then drawn onto the back of the chosen paper and cut out with a fine, very sharp scalpel. You can still see the pencil left behind that I use to guide my cutting and forming.
I built several edge forms based on French curves, used in technical drawing, to allow me to sculpt the individual parts. Some parts, as seen here, are sometimes quite tiny and need tweezers to handle. You find fine detail in all the Paperartzi pieces because, like life itself, the richness of our experience needs, amongst other things, little details built on big chunks.
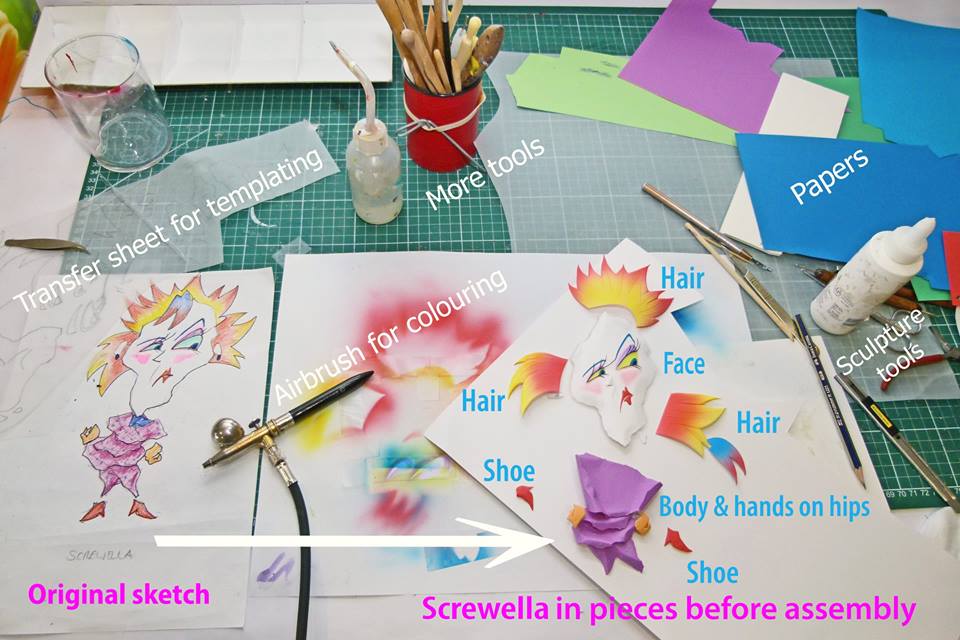
Bringing life through colour
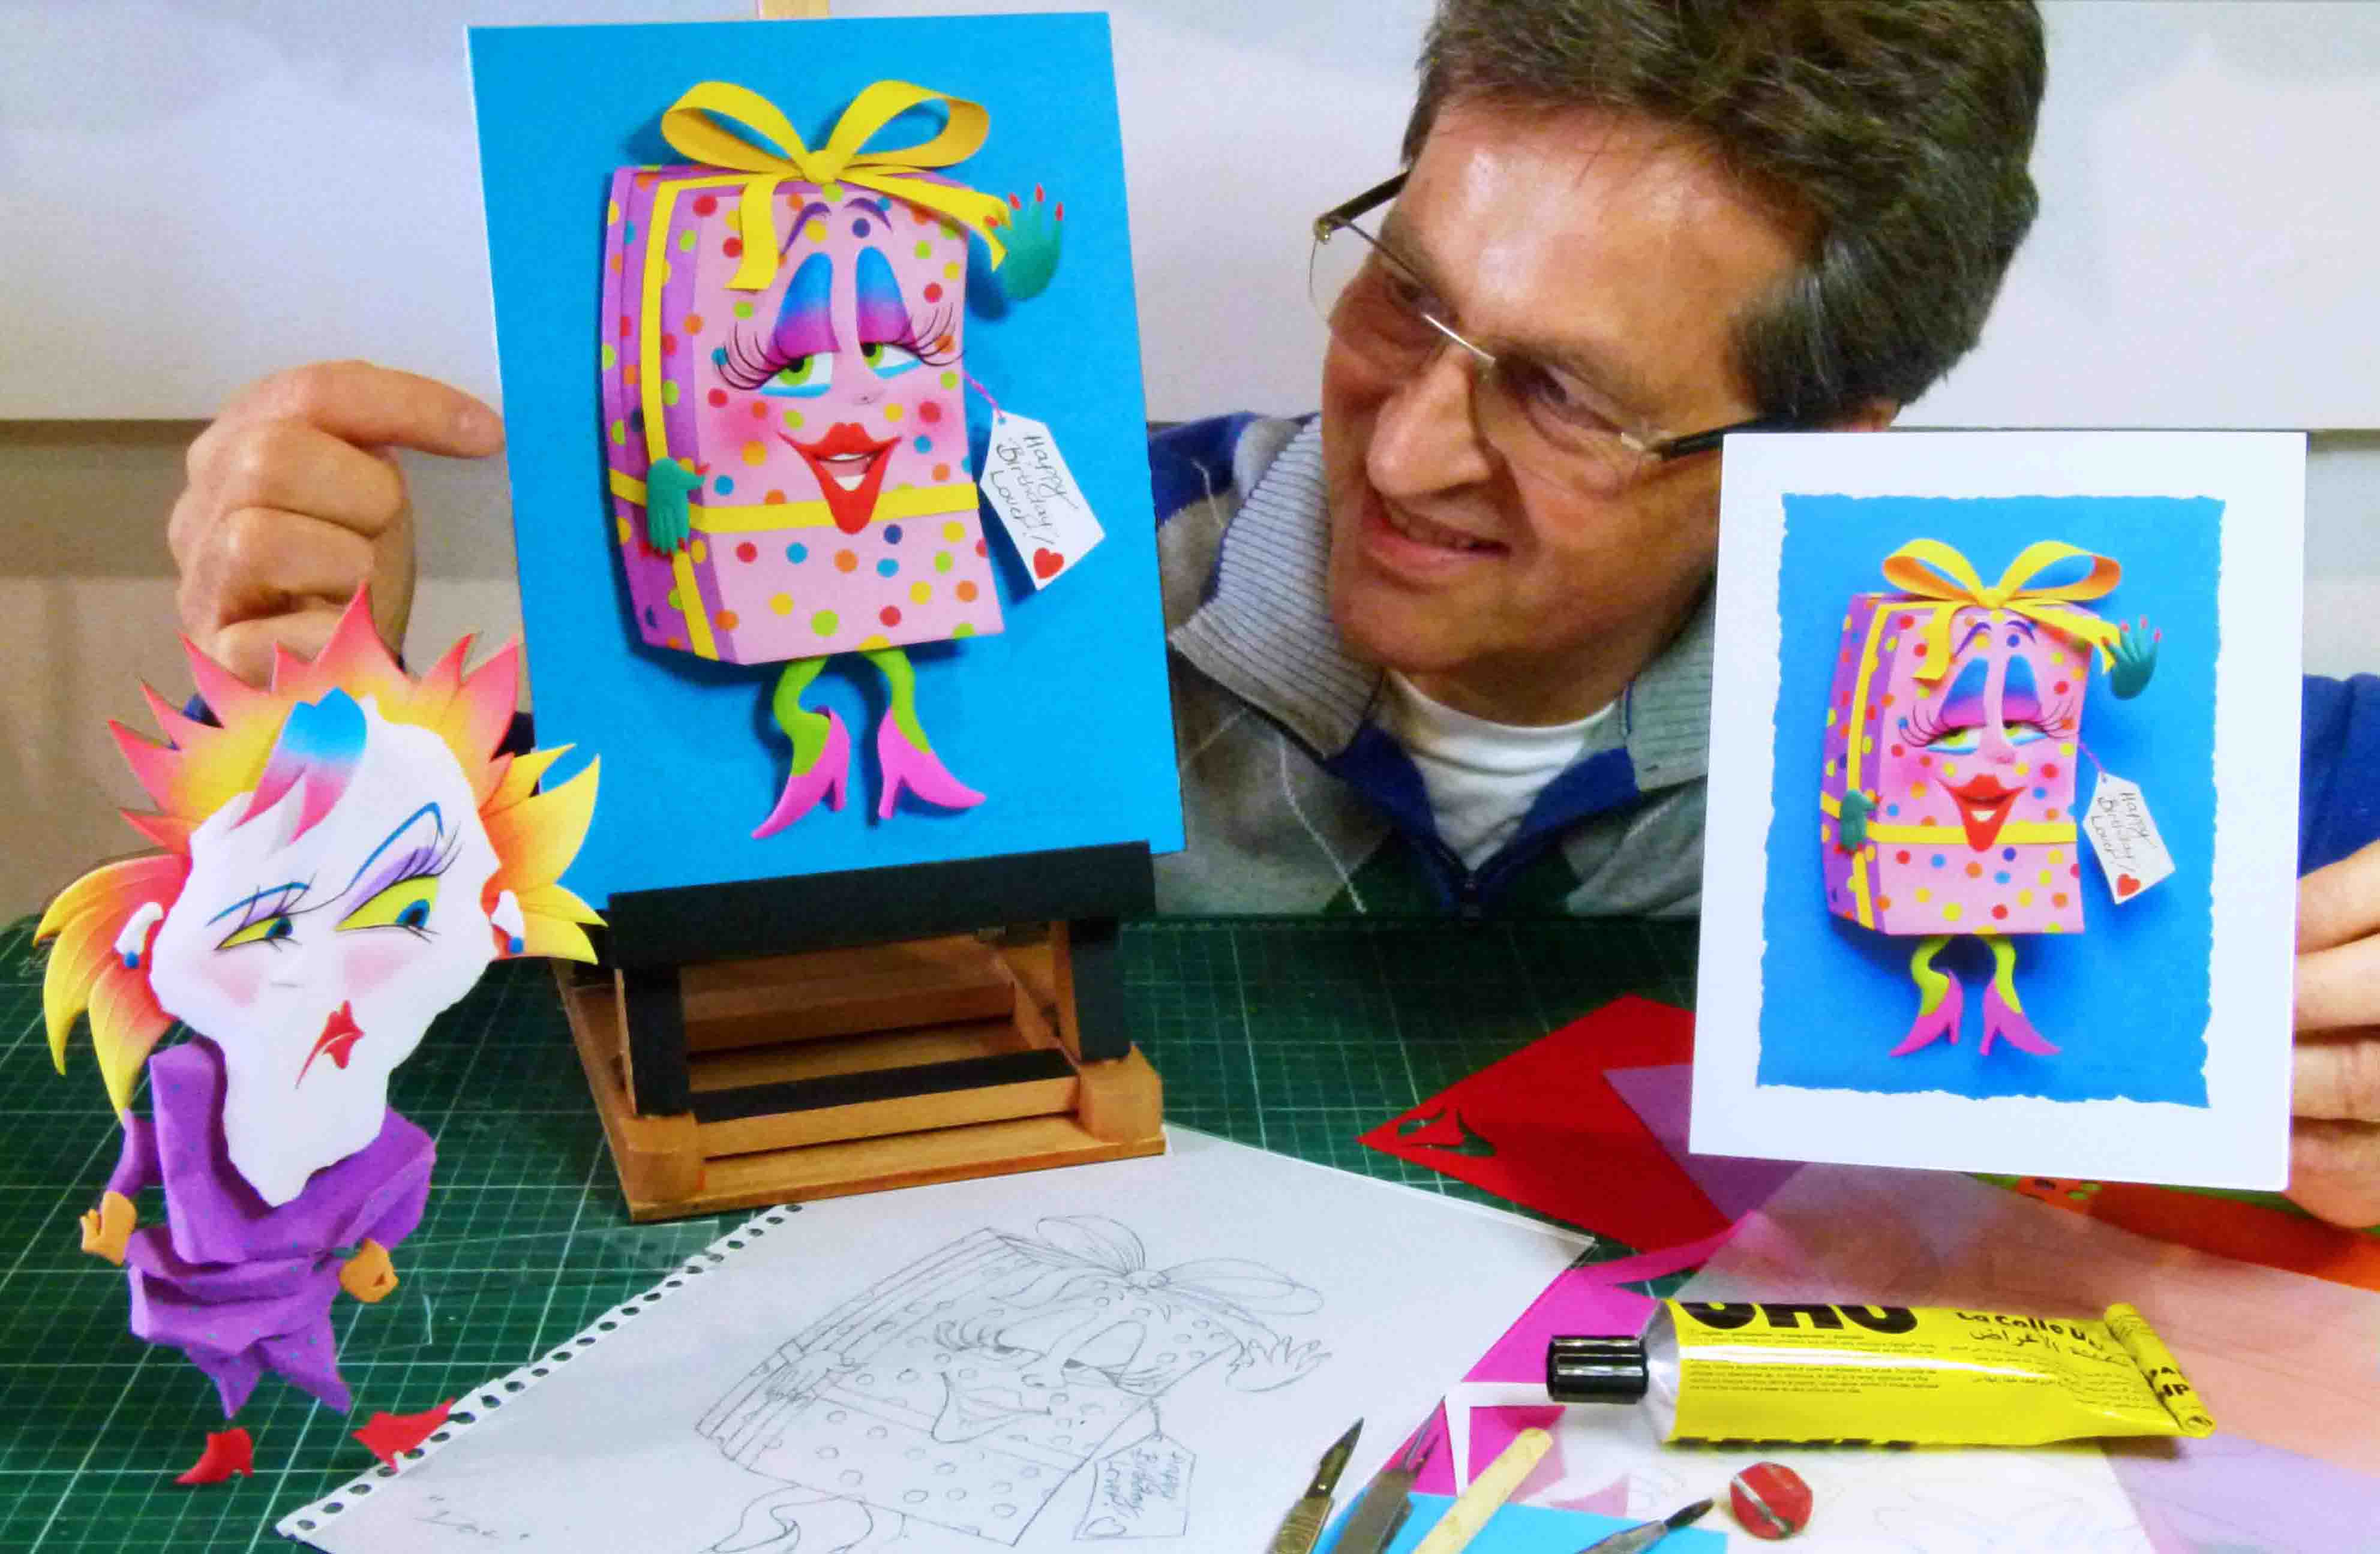
Here is a face part that has been sculpted but now needs some extra colour treatment to liven it up.
The gadget in my right hand some will recognise as an airbrush. It was my favourite illustrating tool during my years of supplying artworks to ad-agencies. Though I always start with coloured papers it’s now an integral part of my finishing technique and allows very fine touches to colour changes and graduations. Livening up cheeks or tipping tufts of hair to happy faces are typical uses.
Final steps
Before final photography, I sometimes do several last experiments trying different papers for the backgrounds. Essentially the Knock on our Door characters looked great but their multitude of colours needed careful background considerations. The one on the left was warm but too busy and a bit pale. The middle one was nice but too cool. After laminating a sheet of pink behind the same paper used on the left, there was just enough show through to get what I wanted, on the right.
Photography
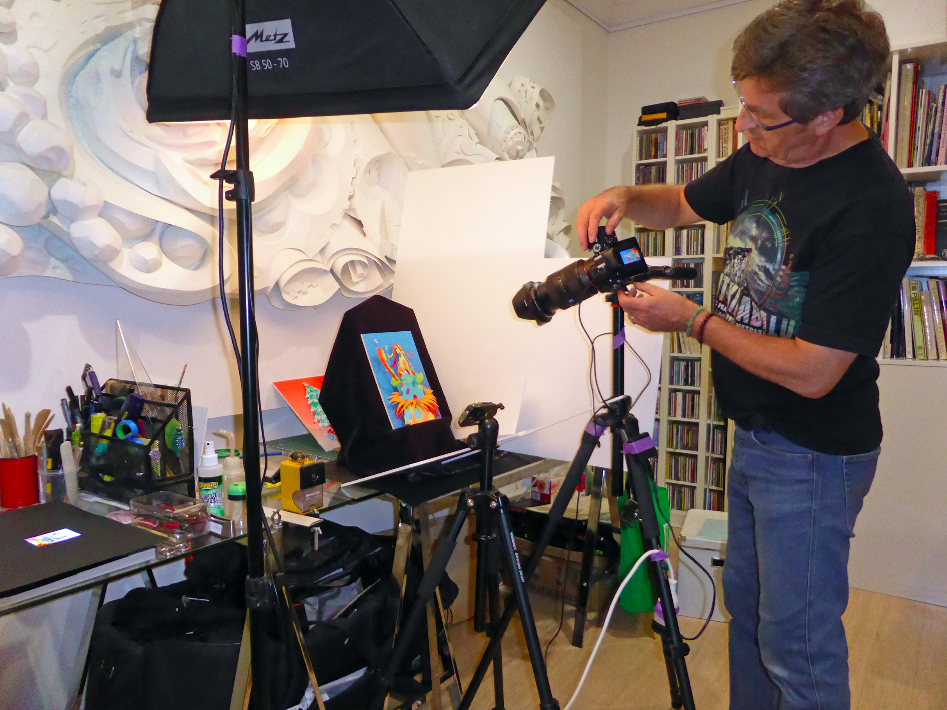
Once an artwork is completely assembled, I photograph it.
Here you see Party Head being prepared.
This is a very skilled job needing careful understanding of technical aspects of photography and most importantly, lighting. The artworks cannot be reproduced without this step, and it can make or break everything.
Having the benefit of being an avid photographer since I was a teen and at least 10 years of working with a professional who mentored me, I now shoot the artworks myself.
For tech heads, the camera is a Sony alpha 7R with full frame sensor. A stunner! The lens, a work of art in itself, is a Zeiss/Sony f2.8, 24-70 mm. The reason is that it allows minor perspective adjustment. Getting the wrong focal length will cause horrible perspective distortion, so I always use the longest possible. I usually shoot at minimum apeture to maintain depth of field but a combination of 1/80th of a second at f 16 and ISO 400 is reasonably average. File sizes average about 10MB.
Lighting correctly
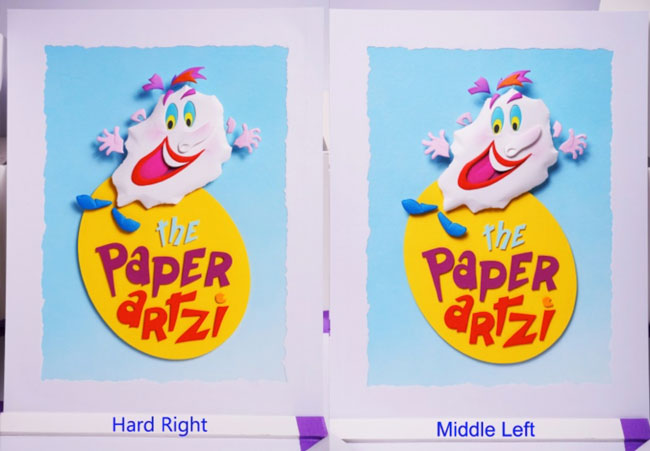
This example shows how lighting works, or doesn’t. The left shot started with lighting from the hard right. The shadow dropped over the left, narrowing the background space and flattening the face. You barely notice the form and the nose almost disappears. Now, compare with the right side where the studio lamp was set on the left, sort of mid-way. The nose stands out and the face has form. The shadow on the background is now in a more balanced place too.
All lined up!
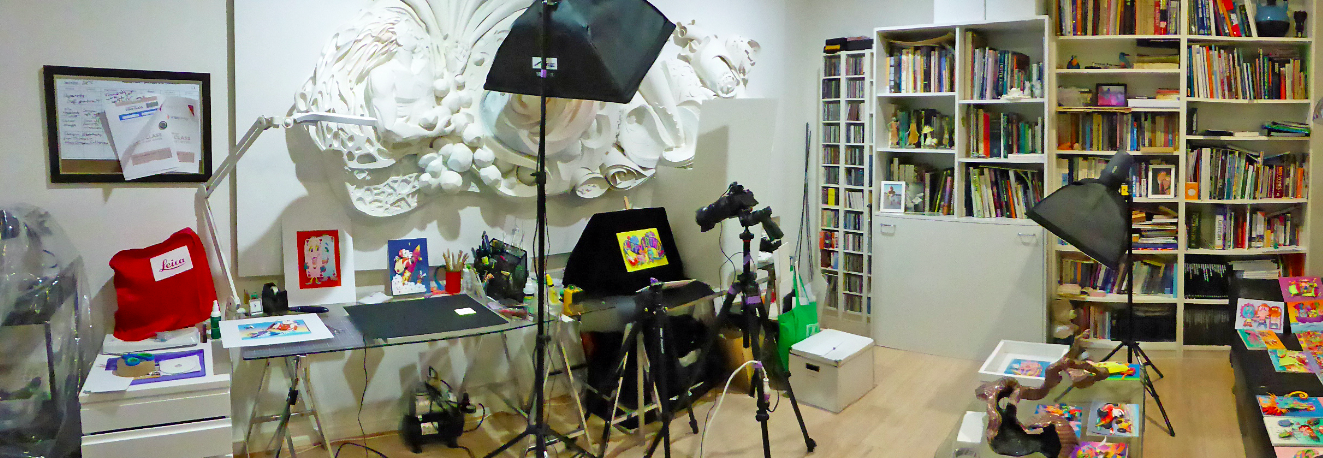
Here’s my studio. The trestle tables are where I usually do all my fine work.
At the time of this photo, you see all the Paperartzi artworks lying about waiting their turn to have their photo taken prior to publishing. It’s just all Rippin good Fun!
(For those interested, the big work on the back was mostly done in a converted garage, which is my workshop for large artworks. See www.papersculptureartist.com)
![]()


